Shadow Masks for Deposition Design Guidelines
At Stencils Unlimited we have developed a broad technical knowledge that might be useful to you when designing shadow masks. We have manufactured many types of designs, some of them may have not turned out right on the first run, but eventually after some tweaking between the customer and our CAM team, are successful. Every time a design fails it helps us understand the limits of what can be done with our lasers. So, to help you design your next shadow mask, we have compiled guidelines which will accelerate your prototyping and production.
DESIGN GUIDELINES
1. HOW DO I CHOOSE THE THICKNESS?
Thickness is fundamental in shadow mask manufacturing. For some use cases, thickness depends on whether the mask will be used for material deposition or for some type of laser beam / optical experiment.
If you are planning to deposit material, the thickness of the mask should be proportional with the total amount of material you need to deposit. You should consider the volume of the area created between the aperture size and height of the walls (the material thickness). If your mask is going to be used for an optical or laser related experiment, the thickness might not be your biggest concern, but you should consider if you need the material to be fully rigid or not. The thinner the material, the less rigid the mask will be.
Generally speaking, if the smallest feature is 50 microns, the thickness should not be greater than 75 microns. Following this principle, the rule of thumb is that thickness should be up to 1.5x times the smallest feature. If the smallest feature of your design is 100 microns, the thickest it can be manufactured at would be 150 microns and so on. The reason for the thickness limits has to do with the nature of the manufacturing process, the laser machines have different variables like power, heat, among others. So depending on the final design we will be able or not to use a specific thickness.
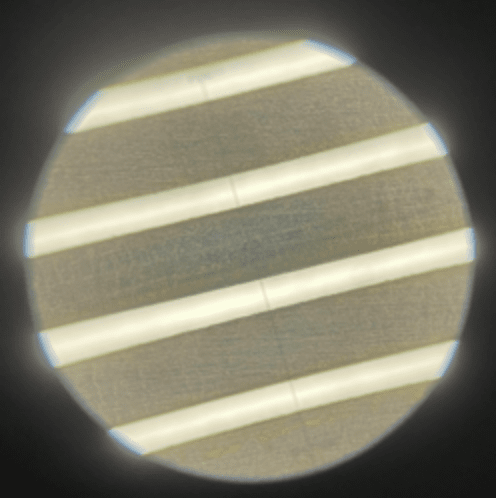
When the laser is melting the metal, pressurized gases (such as nitrogen, argon or another noble gas) are pushing this molten metal out of the piece. If the thickness is greater than the hole size, then the metal will not have enough room and weight to fall off the material. You can see below in figure 1 an example of a shadow mask that was too thick for the aperture size.
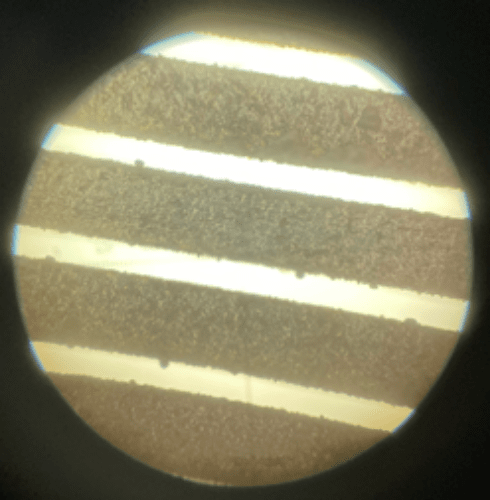
As you can see, the masks features are filled with debris and the edges are too rough. Now take a look at figure 2 which shows the results once the thickness was adjusted.
2. WHAT MATERIALS CAN BE USED?
Stainless steel is the material that offers the fastest turnaround time as well as efficiency. We have manufactured countless stainless steel masks with good results. However we are also capable of manufacturing shadow masks using PH 17-4 stainless steel which has magnetic properties. If your design needs to be magnetic for mounting purposes, it can also be done this way.
If you require a different materials do not hesitate in requesting a quote. The turnaround time and cost might increase but we will do our best to find a manufacturing solution.
3. WILL MY APPLICATION WORK?
Many customers ask us if the shadow mask will work for their application when sending their inquiries. However, we cannot recommend what will or will not work for your project. We can only recommend what can or cannot fabricated. Shadow masks have many use cases and each application is entirely different. We specialize on manufacturing your design as fast as possible with the best possible quality.
4. INTERDIGITATED ELECTRODE DESIGNS
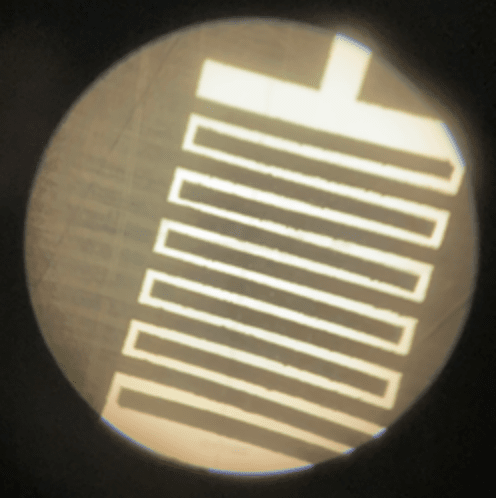
This is a very popular design, it can be done two ways: using positive and negative space. When we say “negative space” we mean that the pattern is cut out of the piece, as you can see in figure 3, the “S” pattern is made of negative space or “air”.
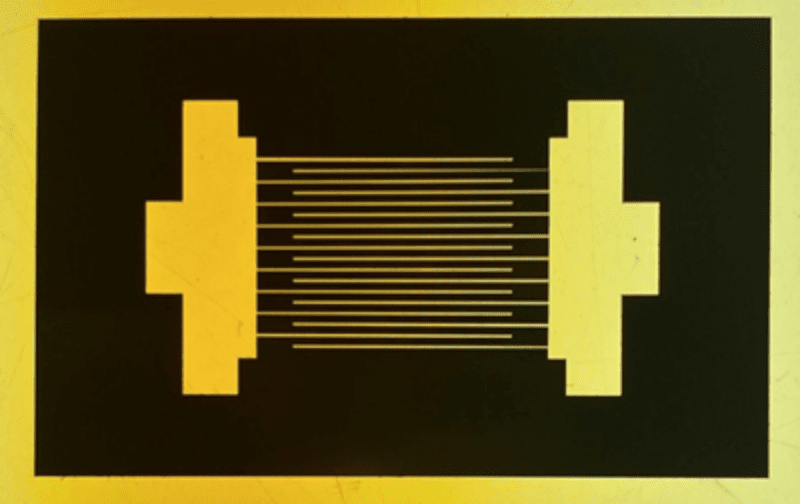
When we talk about “positive space” we mean that the pattern is actually made of metal. As you can see in figure 4, the “S” pattern is made of metal and the “combs” or “legs” are made of air. Both designs can be manufactured at Stencils Unlimited, however, there are some design guidelines you should follow.
What is the width ratio?
There’s a width ratio that you should take into account. Please take a look at figure 5 bellow:
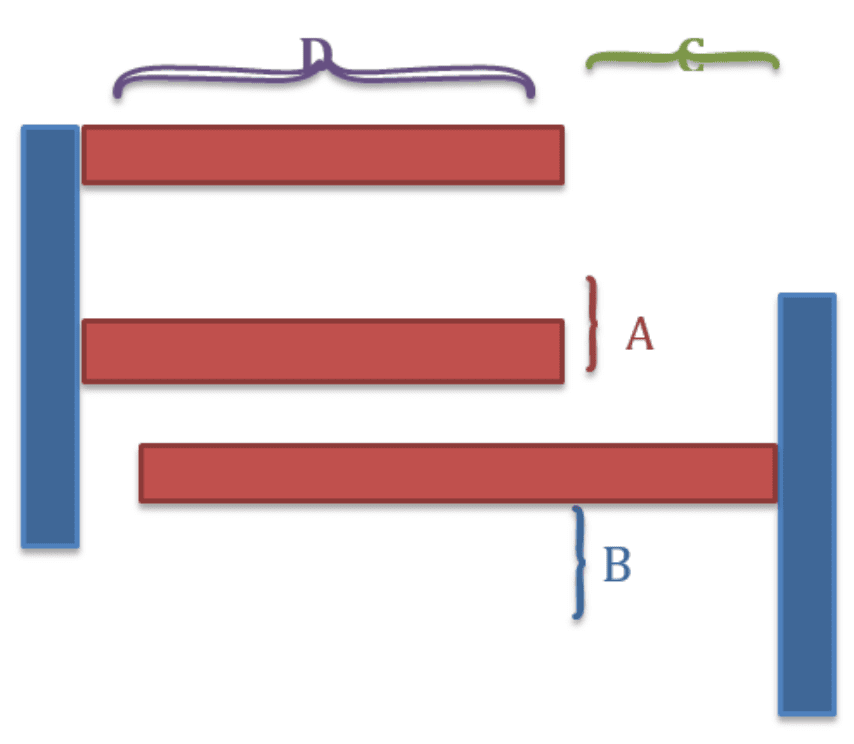

In figure 5, we are going to assume that both red and blue will be “cut out” of the stainless steel piece, this means that the mask will result as shown in figure 4.
For this case, ideally you want the width ratio to be close to one. If you are designing using “positive space” as shown in figure 4, a lot of material will be hanging in the air with no support. If dimension C is too small, then the whole pattern will fall off. A and B tend to be in the 100 to 500 micron scale, if C is also 100 microns it will not be strong enough to hold the weight of the hanging material, instead, we recommend it should be 2 to 3 times the size of the channels’ width.
If the intent of the design is to have the red and blue blocks as “positive space” meaning the mask would look like Figure 3, then the width ratio can be bent a little farther than 1. The most important dimension in that case would be D, if the “leg” is too long when compared to A then the weight of the material will bend the features and render the mask unusable.
5. What is the minimum feature I can cut?
The minimum feature we can cut is the same size of the laser beam diameter, 25um. Please note that since that is the diameter of the laser, the feature would end up as a 25um circle. At this scale, features can only increase in 25um steps, meaning you can design 25, 50, 75 and 100 um features. After the 100um mark you can design whatever dimension you need since laser has more room to move. .
6. Can I have spirals made?
The short answer is no, spirals have a lot of material hanging from one small piece as it is the case with the interdigitated designs, they tend to fall off the mask. The only way to manufacture spiraled shadow masks is to add bridges in between as shown in figure 6 below.
Just as the interdigitated, these spirals can be done with negative or positive space. The width ratio applies the same way, it is convenient to leave room for stability and make sure the final piece is mechanically sound. Please note that both spirals have bridges inside which offer mechanical stability to the piece. If you’re planning to use a shadow mask for material deposition to create a spiral, please consider using two stages of deposition and rotating the mask in order to complete the spiral. Another option is to divide the spiral in two shadow masks and have them complement each other.
7. Is there a minimum or maximum quantity?
No, you can order from one mask up to any quantity you require. Prices and turnaround times will vary depending on quantity and design complexity.
8. What is the turnaround time?
The regular turnaround time for shadow masks is 72 hours, but depending on the quantity and design it can be longer than that. If you need your project to have a faster turnaround time we do offer an expedite service for an extra fee.
9. What files do I need to send Stencils Unlimited?
The best format for us to work with is either Gerber files or DXF format. If you have a design made with a 3D CAD design software package then a STEP file is also acceptable. If you’re not able to provide your design in these formats we can work with a hand drawing as well, however a design and/or engineering fee may apply.
Stencils Unlimited has extensive experience manufacturing shadow masks for a wide range of applications. To get a quote please email your design files to support@stencilsunlimited.com.